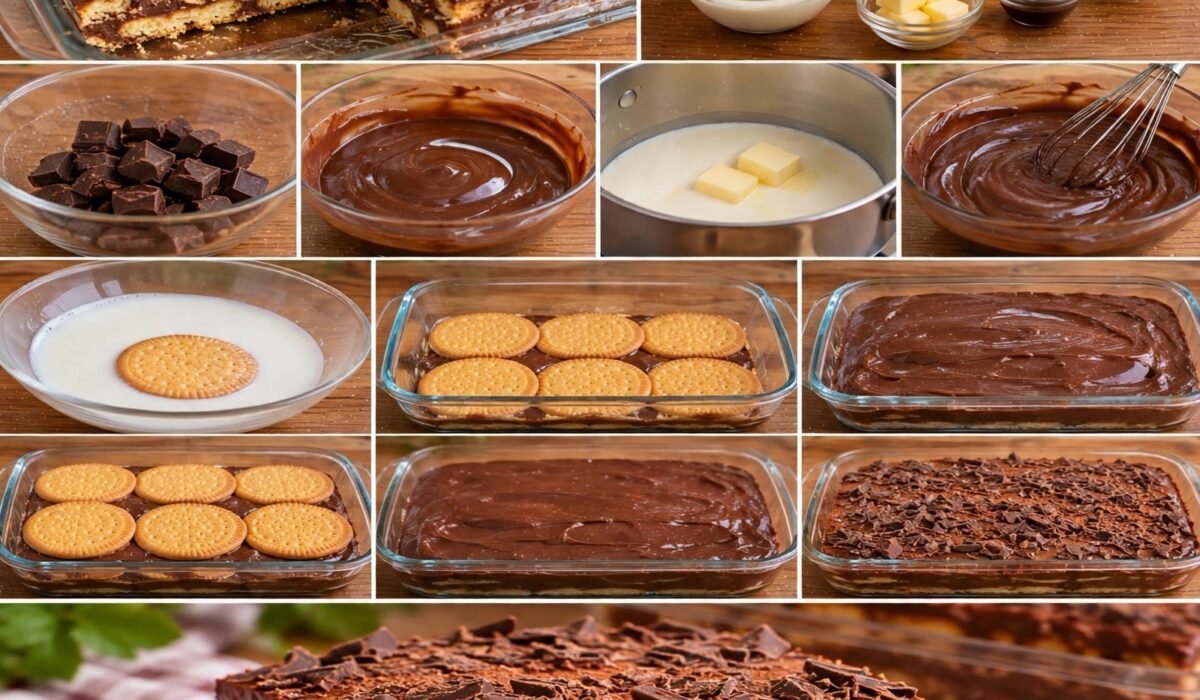


Next, arrange a first layer of soaked biscuits, placing them next to each other.
Try to cover the entire surface to get an even cake.
5. Alternate layers of biscuits and chocolate
Cover the biscuits with a generous layer of chocolate cream.
Smooth gently using a spatula.
Add a second layer of biscuits, then another layer of chocolate.
Repeat the process until all the ingredients are used up.
Always finish with a nice layer of chocolate cream on top.
6. Decorate and let cool
Sprinkle the surface with dark chocolate shavings.
You can also add a light dusting of cocoa for an even more indulgent presentation.
Cover the dish and place it in the refrigerator for at least four hours.
For best results, let it rest overnight. This will allow the biscuits to soften and the different layers to become easier to cut.
Tips for making this no-bake cake
To obtain a particularly tasty chocolate cream, use dark chocolate containing between 50 and 70% cocoa.
If you prefer a less intense dessert, choose a chocolate with a slightly lower cocoa content.
Also avoid soaking the biscuits in milk for too long, as they may break during assembly.
To get clean slices, let the cake rest in the refrigerator long enough and use a clean knife for each cut.
How can I personalize this dessert?
This recipe can easily be adapted to your liking.
You can add a few banana slices between the layers for a fruity version.
Coffee lovers can replace some of the soaking milk with cooled decaffeinated coffee.
For extra crunch, add crushed hazelnuts or toasted almonds on top.
Page 3 of 4