

👩🍳Step-by-step preparation
1. Prepare the biscuit base
Crush the dry biscuits into fine crumbs using a blender. You can also place them in a food bag and crush them with a rolling pin.
Pour the crumbs into a large bowl. Add the melted butter, then gradually add the orange juice, mixing with a spoon.
The mixture should have a moist, sandy texture, able to compact easily when pressed between the fingers. It should not be too runny.
2. Form the base of the cake
Place a 24cm pastry ring or springform tin on a serving plate. You can line the base with baking paper to make unmolding easier.
Spread the biscuit mixture evenly over the surface of the mold, then press down firmly with the back of a spoon or the bottom of a glass.
Take the time to obtain a smooth and compact base. Then place the mold in the refrigerator for a few minutes while you prepare the filling.
3. Add the chocolate-covered cookies
Pour approximately 100 ml of orange juice into a shallow dish. Quickly dip each chocolate-coated round biscuit into the juice, just enough to moisten it slightly.
Arrange the biscuits on the base, distributing them evenly to cover the entire surface.
Don’t leave them in the orange juice for too long: they need to retain enough firmness to form a nice layer inside the cake.
4. Prepare the mascarpone cream
In a large bowl, combine the mascarpone and sweetened condensed milk. Whisk briefly until smooth and homogeneous.
In a second chilled bowl, pour the whole liquid cream, which has been previously kept in the refrigerator.
Whisk at medium speed, then gradually increase until you obtain a firm whipped cream that holds well on the whisks.
Gently fold the whipped cream into the mascarpone and condensed milk mixture in several additions, using a spatula. Mix gently from the bottom up to maintain a light and airy texture.
5. Cover with cream and smooth the surface
Remove the mold from the refrigerator. Generously pour the mascarpone cream over the chocolate-coated biscuits.
Spread the mixture with a spatula, making sure to fill the edges well and cover the entire surface evenly.
Smooth the top carefully to achieve a clean and even finish. This step will give the cake its beautiful, polished appearance after it has rested.
6. Decorate the cake
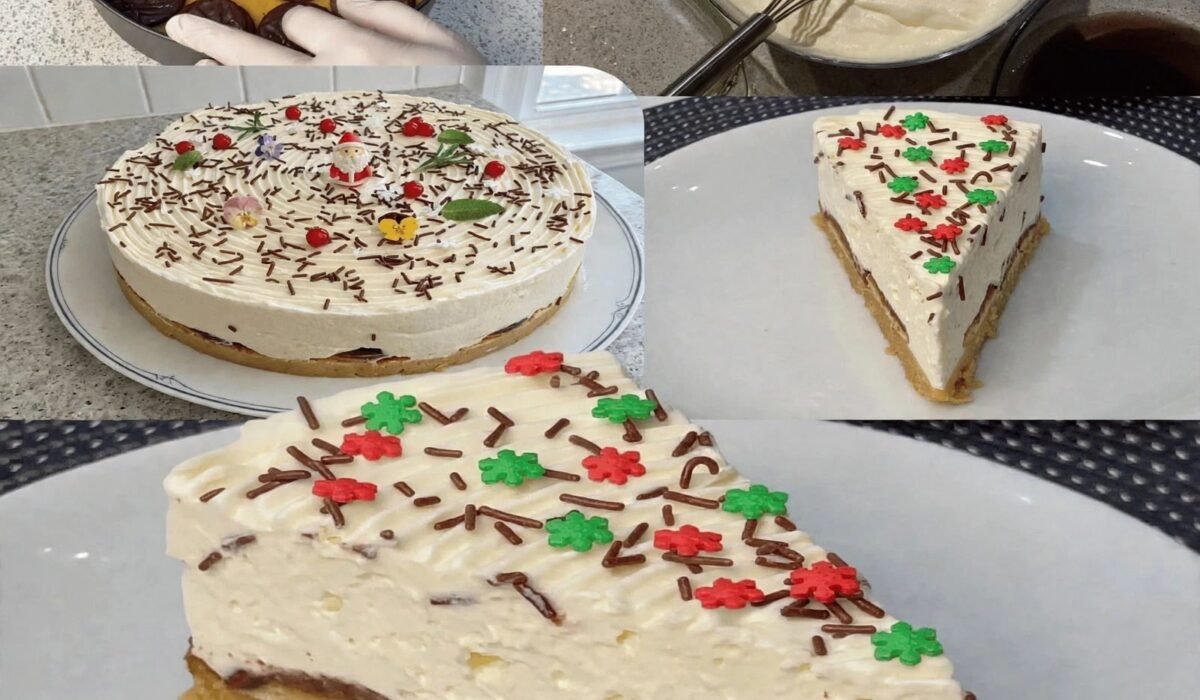
Scatter chocolate vermicelli evenly over the surface.
For a festive presentation, you can leave a beautiful layer of vermicelli visible over the entire surface. The key is to keep the decoration simple and highlight the different layers of the dessert.
7. Let it rest in the refrigerator
Carefully cover the cake without touching the decoration, then place it in the refrigerator for at least 6 hours .
For optimal hold and a cleaner cut, ideally prepare it the day before and let it rest overnight. The cream will firm up and the different layers will stabilize.
When ready to serve, carefully remove the ring or mold. If necessary, run a thin, slightly warmed blade along the sides to facilitate unmolding.
🌿Health tip
Orange juice adds a fruity note and, in particular, some vitamin C.
Mascarpone, butter and condensed milk make this dessert rich: opt for a reasonable portion.
If you have diabetes or high cholesterol, take into account its sugar and fat content.
👨🍳The secrets to baking a successful Christmas cake
A firm base: carefully press the biscuits down with the bottom of a glass. This will prevent the base from crumbling when serving.
A well-measured amount of orange juice: add it gradually to the crumbled biscuits to obtain a moist, but not soggy, texture.
A very quick soak: the chocolate biscuits only need to be moistened. Prolonged soaking risks making them excessively soggy.
A very cold cream: the whole liquid cream must be cold enough to whip properly into whipped cream.
For stiff whipped cream: stop whipping as soon as it holds its shape on the beaters. Over-whipping can make it grainy.
A delicate incorporation: use a spatula and enveloping movements to keep the cream light.
A night’s rest: even if six hours are planned as a minimum, preparing the day before generally gives better results.
🎅Ideas for a beautiful Christmas presentation
To give your cake an even more festive look, pay special attention to the decoration before serving it. Chocolate sprinkles already provide a delicious finish, but you can also add a few decorative touches with chocolate.
Place the cake on a pretty serving platter and carefully remove the ring to reveal its clean edges. A few edible Christmas decorations can complete the presentation without obscuring the dessert’s creamy texture.
Remember to cut the slices just before serving to reveal the different biscuit layers and the generous mascarpone cream.
🎄Gourmet tips: 4 secrets to a successful Christmas cake with mascarpone and chocolate
This no-bake mascarpone and chocolate Christmas cake is a wonderful way to prepare a festive dessert without turning on the oven. Its creamy texture, intense chocolate flavor, and elegant presentation make it a beautiful and indulgent treat for the holidays. To achieve a firm, moist, and beautifully decorated cake, here are four tips to know.
🍫
Choosing a good chocolate
Choose a high-quality dark chocolate, ideally between 60 and 70% cocoa, to provide an intense flavor that contrasts deliciously with the sweetness of the mascarpone. Melt it gently and let it cool slightly before incorporating it into the cream.
🥣
To obtain a smooth mascarpone cream
Use very cold mascarpone and mix it in gently to maintain a thick, creamy texture. If your recipe calls for heavy cream, make sure it’s full-fat and very cold to help it whip up properly.
❄️
Respect rest time
Refrigeration is essential for the cake to set properly. Ideally, prepare it the day before and let it rest in its pan for several hours before unmolding to ensure a firm texture.
🎁
Create a festive decoration
For a finishing touch worthy of a beautiful Christmas table, add chocolate shavings, a few crushed hazelnuts, or a light dusting of cocoa. A few small edible decorations will add a festive touch without overwhelming the dessert.
Page 2 of 3